September 29, 2009

Tuesday's Tips & Techniques: Pinwheels


Pinwheels are so much fun and they are super easy to make. This pinwheel is on the " Soup" layout from my last post:


Begin with a perfect square of DOUBLE sided patterned paper. BOTH sides will show so make sure it looks good on both sides. 
I like to use a punch when I am making smaller pinwheels:


Next you can use a ruler and pencil to mark your cut lines. (I used a marker here so it would show up but I NEVER do this when I am making pinwheels for a layout)

I mark my lines just short of the center coming straight in from each corner:


 Then just cut along your lines. Truth be told, I don't actually mark the lines. I just eyeball it and cut.


Almost time to start folding in your flaps. Choose which way looks best to you (which side you want to fold your flaps toward) and then get out your adhesive dots.


 Place a nice sized glue dot right in the center of your square. I use medium Zots. Then fold in your first flap sticking just the tip of the flap onto the adhesive.


 Keep folding in the flaps, adding adhesive if needed.


 Depending on the weight of my paper, sometimes my flaps need extra help to stay put. I use a stapler for these occasions but that is not pictured here. Glue dots usually do the job just fine.


Once all my flaps are secured. I usually embellish with a button but you can use flowers, a tiny paper circle, gems, whatever you like.


Enjoy!


September 28, 2009

"When It Rains It Pours," it can be a good thing~


Okay, so it has been pouring here for days and days and days but the sun has finally come out as of yesterday and things couldn't be better. Yippee! Finally, a vitamin D shower!


Even better than that, I got some amazing news this weekend. I'm getting a layout published in Scrapbooking.com magazine! I am so excited!!! It will appear in the November issue and is titled "Gentry's." I am so thrilled that the layout is from a trip to Gentry's. We had planned to head out there this weekend, but it was raining...


Then, I got even more amazing news. I have been chosen for the design team over at Creative Cookbooking!!! Check it out and come play along with our challenges!


And then after that, I found out I made yet another design team! Stay tuned, that one hasn't posted the DT announcement yet~


So, it really has been pouring here.


September 25, 2009

~Making Memories~


Here is my absolute favorite portrait of M. It is, of course, on her First Communion day back in April. We got the the church really early that day. I mean REALLY early, so we had plenty of time to do some portraits. In this one, she is kneeling on the altar and the light is shining down from the skylight above.


The paper is Making Memories and the vine is Prima. I adhered it to the layout with giant stitches and then I wound the ends of the vine around a paintbrush to make them look "vine-ier." The font is Storybook, cut with my Cricut, LOVE this font! I inked the little Tim Holtz "Trust" tag and added "in God." M cherishes that part. The calendar is from Jenni Bowlin, I just love circling the date.

Now, guess where that green backing strip came from. The trash! Yep, that is part of the packaging that the Prima vine came in. Too beautiful to throw away. I guess you can call that "real scrapbooking."


September 23, 2009

~Downtown~


I took a stroll downtown the other morning with Dad and B. We had THE best coffee at the Mercantile before strolling through town grabbing some shots of B as we went. My favorites are here in front of the old church. I can feel a layout coming...


This solves the bright GREEN shirt problem:


Did a little antique coloring on this to soften that shirt
Just look at those CURLS~


September 22, 2009

Tuesday's Tips & Techniques: Buttons & Bows


I love to use buttons on my layouts but sometimes I want to tie the button with a ribbon instead of just floss. Usually, my button holes are way too small for the ribbon I want to use like in the layout I posted yesterday.


I learned a neat trick a couple weeks ago at CKC. It's soooooo simple. First choose the button and the ribbon that you would like to use. As you can see, my ribbon is waaaaay too big to fit through the button holes:


Next, tie your ribbon in a bow:


Then, place adhesive on your button. I used a small glue dot:


Then, stick your bow on your button! Voila!!!


September 21, 2009

~Zzz's~


Here is poor little C catching a nap in the van on the way back home last week. She is sooooo tired after school but she loves it!!! And no, her neck/body did not hurt when she woke up, but boy was she MAD!

All papers are Rusty Pickle as are the chipboard letters. Click on the image to make it bigger or scroll on down for some close-ups.


~Here is a close-up view of some more of my dictionary flowers~


 ~Happier days in a tiny little Ranger frame~
I used liquid pearls in the flower above the frame


~I used several trims and ribbons on this layout for added interest and texture~

Coming Tomorrow, the first in my "Tuesday's Tips & Techniques" series...

September 19, 2009

~WICKED girls~


Okay, not really wicked girls but good girls who went to see Wicked. It was a fantastic show and a super fun night out!

September 17, 2009

Tuesday's Tips & Tutorials: Single Folded Flower


I have had some questions about my single folded flowers that I am using in lots of my layouts these days. I've seen lots of folded flower tutorials out there in cyberland, Helen Croft has awesome tutorials on flowers! This is a single fold flower similar to Helen's Dahlia but I like this just as well. Plus, it has fewer steps.


Begin by punching 9 circles out of double sided cardstock -it really needs to be pretty on both sides. I used a one inch punch for this tutorial but if you'd like a bigger finished flower, use a bigger base punch. My finished flowers measure about 2 inches across.


Next, begin folding your flower petals. It is just like starting a paper airplane. Fold the two sides to the middle making a point at the end. This is where you need to decide which side of your paper you want for the flaps and which you want for the base of the flower petals. I usually fold it both ways to see which I like best. No stress here, you can change your mind all the way up to the gluing part!

I like to use a grid under my petals while I'm folding so I can easily get them all the same size.


I use a bone folder to get my edges nice and crisp. This isn't necessary as we are going to fold them up later but it does help when you are placing the petals on the center circle.


Next, I put LOTS of glue on my last circle.


    Begin placing the petals on the center circle. I place four petals on first in a cross pattern like this:


   Then I fill in with the other four petals. It makes it easier to get them on evenly.


Next you carefully fold up all the edges:


Almost finished! Just add an embellishment of your choice to the middle. Here I have added a coordinating button tied with some floss.


That's it, all done!!!

September 16, 2009

My BOY


This layout uses lots of the fun Rusty Pickle items that I picked up last weekend at CKC. It is based on a sketch by Julie Bonner at 52 Weeks. I had to include a photo of the poor vintage dictionary that I am tearing apart for paper. I found it a couple weeks ago at an antique store for only $4.00 and it even came with a companion! I feel guilty each time I tear out a page but when I look at my layout...well, I feel better about it.

Here is where the dictionary paper ended up after lots of punching and distressing with a crimper, ink and a crumple or two.


The Dictionary


Embellishment making in progress~

September 14, 2009

~Portraits~


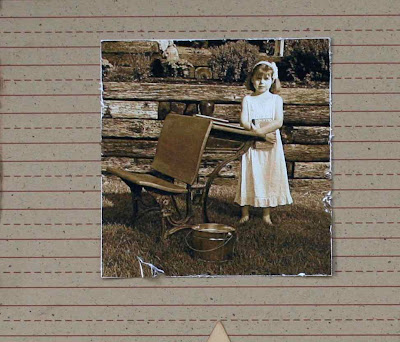
Here are are couple shots of B and C after her "photo shoot" with the vintage school desk.

September 13, 2009

~Old School Layout~


So, here is what I did with that photo of C after I finished aging it in PhotoShop. This layout uses all Jillibean Soup papers and embellishments. I have been trying to get my hands on some of this product for weeks! I attended CKC Nashville this weekend and I finally found some Jillibean at the Vendor Fair, so excited to finally play with it in real life!

I used a brown pen to go around each of the title letters to make them stand out a bit more. The ribbon at the top is called a "bean stalk", is that cute or what?! I distressed the edges of all the papers and especially the photo. I even tore it in one place, sooooo nervewracking to try and tear it just perfectly! The apples are die cut from some cardboard packaging and inked to give them that sweet apple look. The tie on the top apple is another bean stalk. Finally, the star is a die cut from cardstock out of my stash and the four squares are more distressed Jillibean papers.

September 9, 2009

~First Portrait Session~


I have decided to try my hand at taking my own portraits. Here is C's first session. The morning light quickly got too bright so we need to try again, maybe at sunset this time.
Related Posts with Thumbnails