December 22, 2014

Hand Print Christmas Tree Skirt ~Super Simple Tutorial~


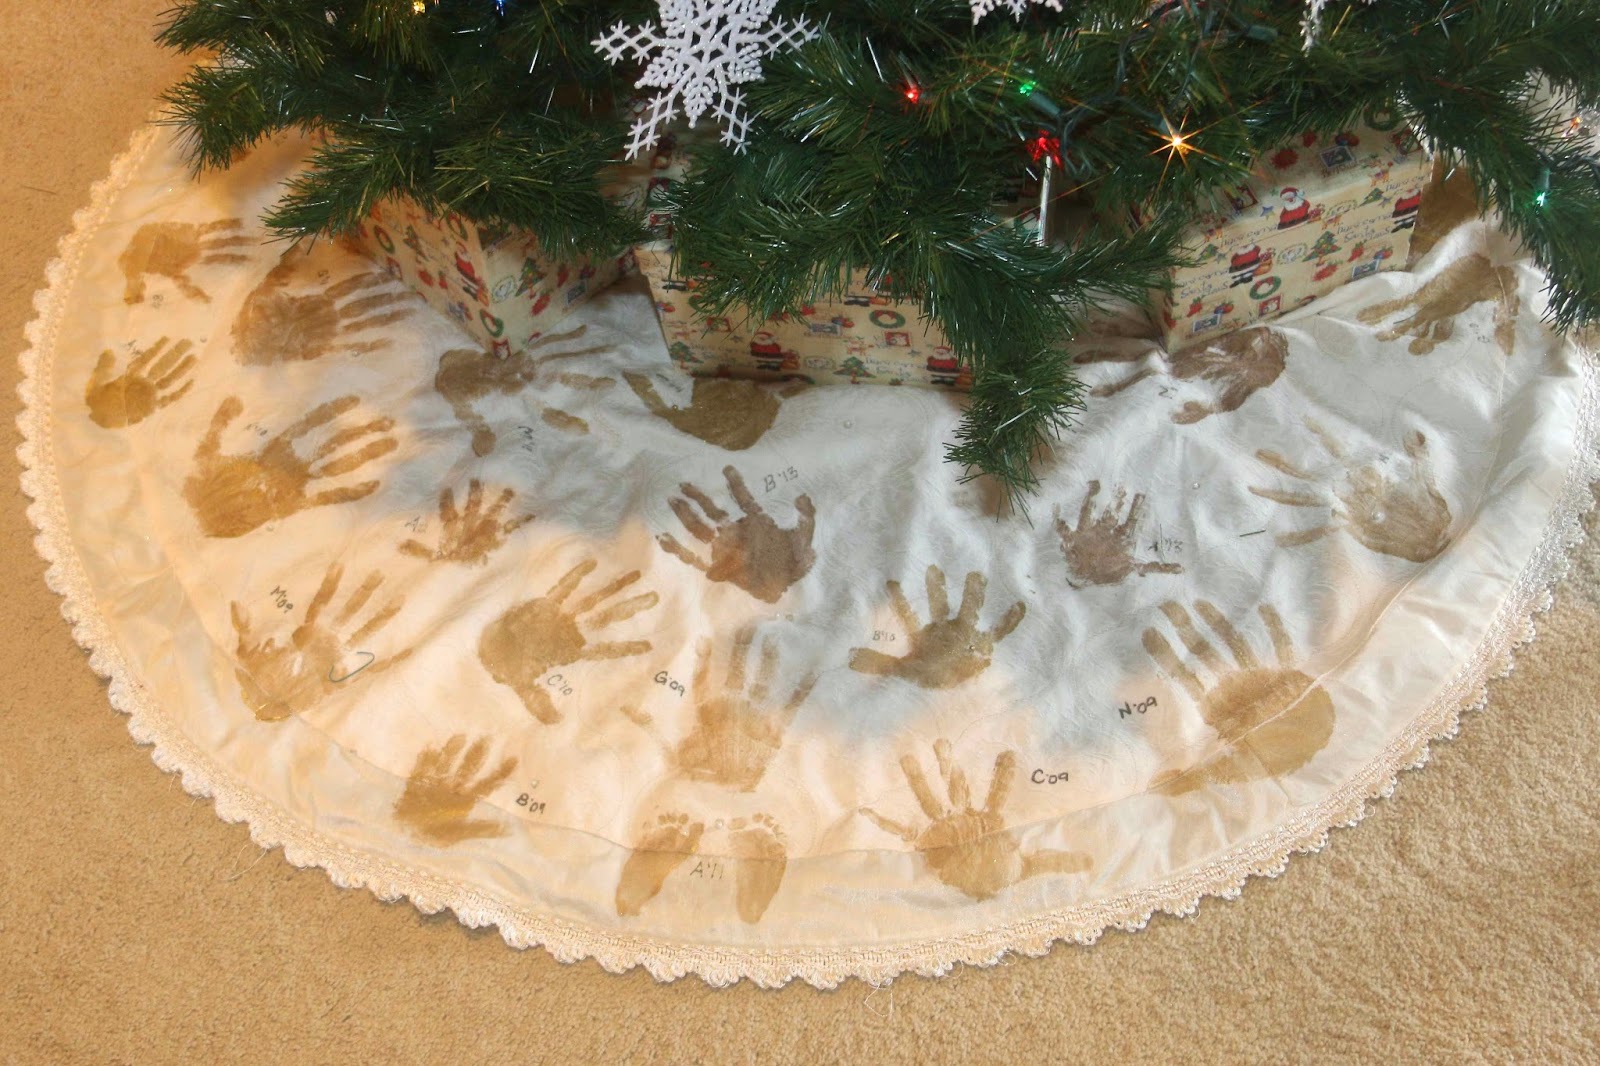
I LOVE capturing my children's hand prints. A few years ago, my friend Suzanne, who just so happens to be Jewish;) gave me this super cute idea for a Christmas tree skirt. It's made with one hand print from each of my children each year. It is so neat to see how they've grown each year as we pull it back out.


I use gold acrylic paint from the craft store. I don't worry about keeping it the same exact shade (manufacturer) from year to year as I mix up the hand print spacing anyway. The kids are expert hand print makers by now so this project only takes me a few minutes at the beginning of each season. 


A chunky paintbrush makes paint application quick and tickely for extra fun;) Simply paint the hand, press it onto the skirt, and carefully lift off so the print doesn't smear.


Then, use a paint pen to mark the child's initial and year. Voila!


Merry Christmas!

December 15, 2014

Back Porch Memories Medley Kit


I'm thrilled to be back over at Back Porch Memories this month working with their Medley Kit. The December kit includes a wide variety of papers and embellishments from Teresa Collins, My Mind's Eye and Fancy Pants.

 This layout is based on the sketch at BPM this month. I love the bright, fun colors! I fussy cut some of the papers and used a border punches on others.  I used my Cricut to cut the deer, love how majestic they look. I am staying current on Christmas layouts for the first time in YEARS! These photos are from THIS year. YAY! 

With some of my kit scraps I wrapped up our chicken feeder candy dispenser. Whipped this out in 10 minutes, even with border punching and machine stitching.


This layout is my first go at a gallery wall layout. I just adore this type of layout. This page starts off my 2014 Christmas album. See, told you I was keeping up this year! It features some, not all, {my children let me know} of our favorite traditions during December. Seriously though, we have LOTS of traditions, waaaaay too many for one page so I told them this is just a teaser for the rest of the album. 
To create the layout I used the Teresa Collins Tinsel & Company goodies that came in my Back Porch Memories kit. I cut the center out of the back paper "frame" to use in other projects and then I trimmed the background paper to fit. Next I cut the frames using both my Cricut and Cameo. I cut the title with the Cameo using white cardstock but it just didn't have the look I wanted. So I gave the title and some of the frames a bit of shine using embossing powder. Then I went to town placing my chipboard and sequins. After I got them all placed in the spot I wanted them to go in, I used a little gold acrylic paint on a few of them, just for a bit of extra shine. I added sequins to the chipboard tree as it was silver and for balance I wanted it gold. 
I've got a couple more layouts using my kit and some SUPER CUTE photos to share with you soon.

Happy Holidays!

November 11, 2014

6 to 7 with a shadowbox layout


It is really hard for me to believe that my baby boy is already 7 years old. It seems like time increases in speed each and every day. Sigh.

As his birthday approached I went to search in his scrapbook for the layout I did of him wearing his 5 shirt and his 6 shirt. 


I couldn't find it anywhere. Then I remembered that the layout had been called for publication last spring in one of the Northridge Publications magazines. Exciting at the time but somewhat devastating now as I have received neither compensation nor my project back. I know something odd is going on at Northridge but they have TEN of my projects, three of them precious layouts of my children and I so want them back.
However, I have come to the sad realization that I may not ever get them back. So today, I scraplifted my 5 to 6 layout while also following a sketch from Back Porch Memories.

 I used the Walnut Grove line of papers from Pebbles, love this line!
 I've seen shadowboxes everywhere lately so I wanted to try my hand at it. So fun! I used my Sizzix and the Hearts die to cut both chipboard and cardstock. I layered them together and topped the stack with a piece of acetate cut from the temporary license plate holder off my oldest son's car. (Serious upcycling!) Then I topped it with a red piece of cardstock, filled it with some square sequins and closed the back with an orange die cut of the large heart.


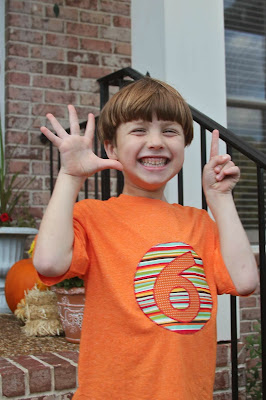
I make him a new shirt every year using my Cricut and some Pellon. (Click here for a tutorial) I've used a bit of the extra fabric on both of the layouts just to give them that extra sentimental touch. I also used the same arrow stamp from Maya Road that I used on the 5 to 6 layout.  I feel like I  recreated a little of it in this new layout while adding some of my current favorites: twine clusters, wood veneer hearts and sequins.

So far he loves the shirts but I know the age when he won't is coming. And coming quickly. So I'm enjoying every moment right now!


January 23, 2014

Hello High School & December Daily Finally Finished


It is still hard for me to believe that I have a child in high school. Two? Oh. Yeah, I mean TWO young men in high school. Sigh. I do remember my mom telling me that time would fly, boy was she right!

 So, my freshman was kind enough to let me snap a quick photo of him setting his locker up. Then I took a photo of little tiny him in front of great big school. That bottom photo pretty much sums it all up for me. Sigh.
The supplies for this layout are out my GDT kit from Back Porch Memories. The line is Notable from We R Memory Keepers. LOVE.

Ahhhhh, back to babies. This is my dear, sweet, little baby girl last winter enjoying the snow. She must have been FREEZING but she never stopped smiling or enjoying the winter wonderland in our very own backyard. Supplies are MORE {can you believe how much they squeeze into the kits?} out of my GDT kit from BPM. This line is Fancy Pants' Timbergrove. Swoon.

**************************
On another note...
I...
Finally finished my December Daily album. My BFF came over and looked at it a few days ago...it wasn't quite finished then and that was all the push I needed. Three hours later...done, finished, complete. 

These are a few of my favorite pages:


As you may notice from these photos, I still have a Christmas tree up...having a little trouble letting the season go this year. Strange, I am usually VERY ready to put it all away come the New Year. Hmmmm, not sure what this means.

Check back soon for a super simple tutorial on how I made the background paper for my "Snow Day" layout. In the meantime, take a peek at these magazines out this month, I have a few fun projects featured in them;)


January 3, 2014

Happy New Year, Project Life and Back Porch Memories


Phew, that is quite a title. I guess I am worn out from the holidays, the creative titles just aren't coming to me;).
Let me begin by wishing you a very Happy New Year! We stayed up with the littles this year and so are still recovering a bit. Here they are at 11:16 New Year's Eve:

You might notice that Nikolas is missing. He left for a party earlier in the evening. 

I knew this day would come. I also knew I would never be ready for it. I must admit that I did shed a tear or two but I know I need to let him spread his wings. Still. It was our first official holiday where we did not celebrate it all together. Sigh.
 *************
Moving right along, I have some exciting news! I am guest designing over at Back Porch Memories this month. It feels so nice to dip my toe back into designing with a team again. The group over there is fantastic and I have really enjoyed getting to know them. I have a sneak peek at the Medley kit I am playing with this month:


I have been running both my Cricut and my Cameo in overdrive cutting lately. For this layout I cut feathers, arrows, leaves and corn. I used both embossing and distress ink to give the cornstalk some texture and depth. I created the cornstalk in Cricut Craft Room using the Just Because Cards cartridge. Originally it had only one ear of corn but with a couple quick clicks I gave it three. If you have a Cricut and you haven't tried CCR, I highly recommend it.
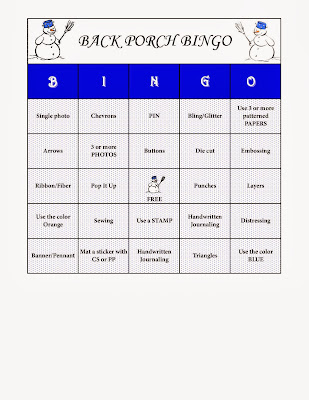
 I just love the look of autumn layouts with TONS of distressing, hence my paper edges in this layout.  I am also really loving layering these days. Perhaps I feel like my stash is large enough to indulge in it a bit;). The Medley kit from Back Porch Memories has tons of papers and is filled with all sorts of great little embellishments. I have three more layouts in progress and even a couple of cards! It you are up for a game-challenge, I am hosting Bingo at BPM this month:
 
Simply complete a layout including each item in any row or column and load it into the gallery at BPM. That's it. {You don't even have to use a kit} Each entry earns you a spot in the grand prize drawing at the end of the month. I'd love to have you join me. For details, come visit us on the Back Porch.
********************
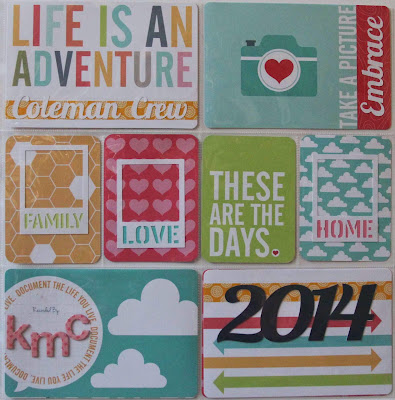
Lastly, I am giving Project Life a try this year. I have debated this undertaking for a couple of years now. I actually bought my kit in July. I thought that might be enough time for me to learn enough about how to do it, how to stay organized and especially how to stay motivated. I used a similar format for my December Daily (almost completed...) just for some practice. And now, (imagine drumroll please) my cover page:
Off and scrapping! 

In December I bought myself a sweet little weekly calendar so I could keep notes and such. You know, stay super organized so I wouldn't forget any details or lose any memorabilia... Well, I went to pull it out on Wednesday to make an entry about the bonfire we had in the backyard and would you believe it!?!?! LOST. Really? Is that how 2014 is gonna go? I just kept calm and took my dad to Target where he promptly bought me a new one. (He doesn't know about the lost one...ssshhhh).

May you have a healthy, happy and scrappy New Year!


December 17, 2013

December "Daily." It's Actually Working!


 Follow my blog with Bloglovin

So I decided to try a holiday mini-album again. Not sure WHY I do this in such a small format when I have such a large family. And NOT daily, I just can't take the pressure. But nonetheless a holiday mini that I try to keep up with throughout the season and that I try to use to include the little things that go on in life during the holidays. What I really love about this year's album is that I am giving the Project Life style a trial run before I try to tackle it for 2014. So far, it is actually working pretty well! Of course, I still have a long way to go but here is what I have so far:
The Cover


As you can see, I start with finished pages and end up with newborn foundation pages that have no embellishments whatsoever. Yet.
Still, it's a great start for me and I am really enjoying the process. I love to give new things a try in mini-albums. I am learning to use my new Cameo that my mom and my mom-in-law got me for my birthday (thanks Mom and Mary!) I made a sequin pocket that I love and will definitely do again, I've toyed with some overlays that turned out well and of course, I used my Cricut to make some cards and pages from the Edge to Edge cart.

Hope this finds you all enjoying the season!


November 20, 2013

How To Create Your Own Iron-Ons using the Cricut and "She's Two."


Thanksgiving? Next week? I'm not sure if it was the odd weather we had this summer or the trees changing colors so late this year but I am feeling really...well, like the "baby" looked on her 2 year old photo shoot yesterday:
I have done NOTHING to prepare. No menu, no shopping. But like Scarlett says, "I'll think about that tomorrow." Except I really mean it. Thank goodness for scrapbook pages of holiday tables and that scrappy recipe book in my kitchen. And thanks, especially, for my mom, who still manages to do half the work for the Thanksgiving meal. At least I know we will have the turkey defrosted (I loathe that process) and mashed potatoes at the table.

So tomorrow not only am I gonna have to plan and shop for Thanksgiving, I might even try to squeeze in photo shoot #2 since my subject was more interested in blowing the "wishers" than posing for portraits...

 And then she just up and ran off. I let my photo assistant catch her for me.
 However, all was not lost. I did manage to catch this sweet look right after we got back from ice skating lessons for my homeschooler.
I'm pretty happy with this one...Love her smile and the fact that we just popped out of the van, onto the front lawn and captured this with one snap of the camera. ONE. I'm trying to give myself a break...at least I am finally shooting in full manual.
*************************************
 Cricut Iron-Ons. From Fabric. So EASY. So fun and so FAST!

I wanted to hide this cluttered look.

So a few months ago I made a cover for my sewing machine from canvas and scraps of fabric along with some Jenni Bowlin buttons. I had always planned on decorating the middle but I'm just now getting around to actually doing it.


I decided to add a simple heart to the middle since I am after all trying to avoid the clutter...

I have used my Cricut to make several iron-ons now and so far, so AWESOME. No mistakes, no waste, only success! My favorite project so far has been my "baby" boy's 6 shirt.

 To make my iron-ons with the Cricut, I use Pellon Heavy-Duty Wonder-Under.
It is sold from a bolt at your fabric store.

I cut my Wonder-Under to the same size as the fabric. It's sticky once ironed so it's best to keep them close to the same size. I don't go all the way to cutting them together exactly as I have a special piece of broadcloth that I use to protect my iron but I get it as close as I can with the little patience that I do have;).

It helps that I have a handy, dandy measuring cover on my ironing board.

I place my Wonder-Under backed fabric on a clean STICKY mat and press with a brayer. I put my fabric on paper side down. You will see why later;). Oh, and set your blade depth to 6.

Speaking of blades, I use a very sharp blade reserved for cutting fabric only.

Once cut, the fabric peels right off, leaving the paper on the sticky mat! Yay, saves the annoying step of peeling that paper off of the fabric.

Just your cut is left...

And it comes right off, easy peasy.
Now, I have heard that some people like to reverse the image in CCR and place the fabric paper side up. I have never tried this but I imagine that might be the way to go if your cut is more intricate. But I just can't give up the way the mat peels the paper off for me. I am so prone to those little paper cuts under my nails from peeling backings off...

Moving on. Before I iron my cut onto my project I always tape my cut in place, to make sure I know just where I want it permanently. Washi tape is perfect for this.

Then I check the Pellon directions once more...15 seconds or 7 seconds, I always forget which time goes where.

And done. Well, maybe. I love the look of stitching. Everywhere. Just about all of my cards and scrapbook layouts have some sort of stitching so I went around the heart with a simple zig-zag stitch. I kept it pretty loose as I really wanted to outline the heart in green but none of my thread matched. So I used pink and I'll see if it grows on me. If it doesn't, I'll be able to rip it out and redo it in green.


So there you have it. Simple. This project took me 15 minutes. Start to finish. Yes, really. If I hadn't had to reload my bobbin, it would have be 13 minutes! I hope you give it a shot. If you do, leave a comment and link to your project, I'd love to see it!

Related Posts with Thumbnails