I have had lots & lots of questions recently about how I make my folded flowers so I am going to post another "rerun" tutorial. This particular tutorial was my very first tutorial EVER! I love that it mentioned Helen Croft since I now proudly serve on her design team. I KNOW when I originally ran this post that I never dreamed I'd make HER design team!
I have had some questions about my single folded flowers that I am using in lots of my layouts these days. I've seen lots of folded flower tutorials out there in cyberland, Helen Croft has awesome tutorials on flowers! This is a single fold flower similar to Helen's Dahlia but I like this just as well. Plus, it has fewer steps.
Begin by punching 9 circles out of double sided cardstock -it really needs to be pretty on both sides. I used a one inch punch for this tutorial but if you'd like a bigger finished flower, use a bigger base punch. My finished flowers measure about 2 inches across.
Next, begin folding your flower petals. It is just like starting a paper airplane. Fold the two sides to the middle making a point at the end. This is where you need to decide which side of your paper you want for the flaps and which you want for the base of the flower petals. I usually fold it both ways to see which I like best. No stress here, you can change your mind all the way up to the gluing part!
I like to use a grid under my petals while I'm folding so I can easily get them all the same size.
I use a bone folder to get my edges nice and crisp. This isn't necessary as we are going to fold them up later but it does help when you are placing the petals on the center circle.
Next, I put LOTS of glue on my last circle.
Begin placing the petals on the center circle. I place four petals on first in a cross pattern like this:
Then I fill in with the other four petals. It makes it easier to get them on evenly.
Next you carefully fold up all the edges:
So that's it, my very first tutorial. I have used these flowers in so many layouts since. They really are quick and easy!
Just last week I posted a layout with one of these flowers:
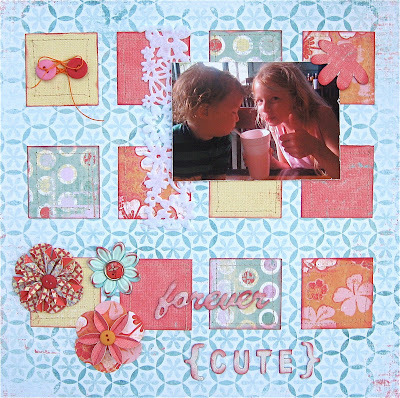
And last summer I made this layout with a horrible cell phone photo but it really captured "a moment."
And one more version with fewer petals:
For MANY more ideas for making flowers, head over to Helen's site!
Happy Scrapping!


7 comments:
Thanks so much for the tutorial on how to make this flower. It's sooo pretty!
Great flower - I will have to have a go - forgot to leave a comment but I tried your pinwheel out on a LO last week - thanks for the inspiration.
Great tutorial Kristie. I saw the flowers on the layout you did for Let's Scrap and loved them. I thought they would be a lot harder to make then they are. Thanks so much for sharing how to make them.
Thank you much for this tutorial! I like this lovely flower and i'll make the same!
Great tutorial Kristie - love the flowers & all these awesome pages of examples!!! Definitely have to try it :)
That's a fantastic tutorial Kristie! Those flowers are very cool, I'm gonna try that on my next project. Thanks for sharing :)
get tutorial, appreciate the share.
ava
cottagerca
Post a Comment